
Vue3 中使用 Tinymce
1. 安装 tinymce 和 tinymce-vue
shell
npm install tinymce
npm install tinymce-vue2. 处理文件路径
- 在
public文件夹(如果是Vue2则在static文件夹)下新建tinymce文件夹 - 语言包:默认为英文界面,如果需要改为中文界面,则需要下载一个 中文语言包 ,在
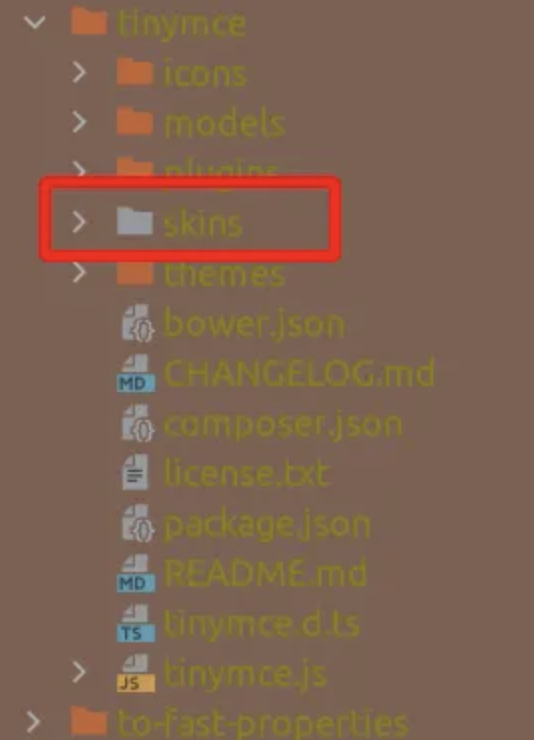
tinymce文件夹下新建langs文件夹,将下载的文件放在langs文件夹中 skins样式:在public文件夹(如果是Vue2则在static文件夹)下新建tinymce文件夹,在node_modules中找到skins,将整个文件夹拷贝到/public/tinymce/中
3. 对 editor 组件进行二次封装,新建 TinymceEditor.vue
vue
<template>
  <div>
    <Editor v-model="content" :init="myTinyInit" :id="tinymceId"></Editor>
  </div>
</template>

<script setup lang="ts">
import {computed, defineEmits, defineProps, onMounted, reactive, ref, watch} from 'vue'
import tinymce from "tinymce/tinymce";
import "tinymce/skins/content/default/content.css";
import Editor from "@tinymce/tinymce-vue";
import "tinymce/icons/default/icons";
import "tinymce/themes/silver"; // 界面UI主题
import "tinymce/models/dom"; // 这里是个坑 一定要引入

//按需引入插件
import "tinymce/plugins/image";
import "tinymce/plugins/table";
import "tinymce/plugins/lists";
import "tinymce/plugins/link";
import "tinymce/plugins/help";
import "tinymce/plugins/wordcount";
import "tinymce/plugins/fullscreen";
import "tinymce/plugins/importcss"; //引入自定义样式的css文件

import { uploadFile } from "@/api/textbooks";

const props = defineProps({
  value: {
    type: String,
    default: ""
  },
  plugins: {
    type: [String, Array],
    default:'lists link image table help wordcount',
  },
  // toolbar 可配置选项: https://www.tiny.cloud/docs/tinymce/6/available-toolbar-buttons/
  toolbar: {
    type: [String, Array],
    default: 'undo redo | formatselect | bold italic forecolor backcolor | alignleft aligncenter alignright alignjustify | bullist numlist outdent indent | table image | help',
  }
});
const emit = defineEmits(['input']);

const tinymceId = ref(
  "vue-tinymce-" + +new Date() + ((Math.random() * 1000).toFixed(0) + "")
);
const loading = ref(false);

const myTinyInit = reactive({
  language: "zh_CN",
  language_url: "../../../public/tinymce/langs/zh_CN.js", // 语言包的路径,具体路径看自己的项目
  width: '100%',
  height: 600,
  branding: false,
  menubar: false,
  resize: false,
  font_size_formats: "8pt 10pt 12pt 14pt 16pt 18pt 20pt 22pt 24pt 36pt",
  font_family_formats: "阿里巴巴普惠体=Alibaba_Normal;Andale Mono=andale mono,times;",
  skin_url: "/tinymce/skins/ui/oxide", //手动引入
  content_css: '/tinymce/skins/content/default/content.css', //手动引入
  content_style: `
    @font-face { font-family: 'Alibaba_Normal'; src: url('https://coco-1302339726.cos.ap-shanghai.myqcloud.com/font/Alibaba_PuHuiTi_2.0_55_Regular_55_Regular.ttf') format('truetype'); font-weight: normal; font-style: normal; }
    body { font-family: 'Alibaba_Normal'; }
  `,
  toolbar_mode: "wrap",
  plugins: props.plugins,
  toolbar: props.toolbar,
  images_upload_handler: (blobInfo, progress) =>
    new Promise((resolve, reject) => {
      let file = blobInfo.blob();
      if (file.size / 1024 / 1024 > 200) {
        reject({
          message: "上传失败,图片大小请控制在 200M 以内",
          remove: true,
        });
      }
      const formData = new FormData();
      formData.append("file", file);
      formData.append("fileType", "editor");
      loading.value = true;
      uploadFile(formData)
        .then((res) => {
          loading.value = false;
          if (res.result === 'ok') {
            resolve(res.data.result);
          }
        })
        .catch(() => {
          loading.value = false;
        });
    }),
});


const initContent = computed(() => {
  return props.value
});

onMounted(() => {
  tinymce.init({});
})

const content = ref();
watch(initContent, (newVal) => {
  content.value = newVal;
}, { deep: true, immediate: true });

watch(content, (newVal) => {
  emit("input", newVal);
}, { deep: true });

defineExpose({
  tinymceId,
});
</script>

<style scoped lang="scss">
</style>4. 在组件中的使用
vue
<template>
 <Editor
      :value="currentOutline.outlineDesc"
      @input="(val)=> handleGetContent(val)"
      :plugins="tools.plugins"
      :toolbar="tools.toolbar"
    />
</template>
<script setup lang="ts">
const tools = computed(() => {
  const common = {
    toolbar: 'fullscreen | undo redo | styles | fontsize fontfamily | bold italic underline | align | link | bullist numlist',
    plugins: 'fullscreen link lists',
  }
  if ([CocoSymbol.ModuleType, CocoSymbol.ProjectType].includes(currentOutline.value.outlineType)) {

  } else if ([CocoSymbol.SectionType, CocoSymbol.CustomViewType].includes(currentOutline.value.outlineType)) {
    common.toolbar += ' | image | table';
    common.plugins += ' image table';
  }
  return common;
});

const handleGetContent = (payload) => {
  currentOutline.value.outlineDesc = payload;
};
</script>