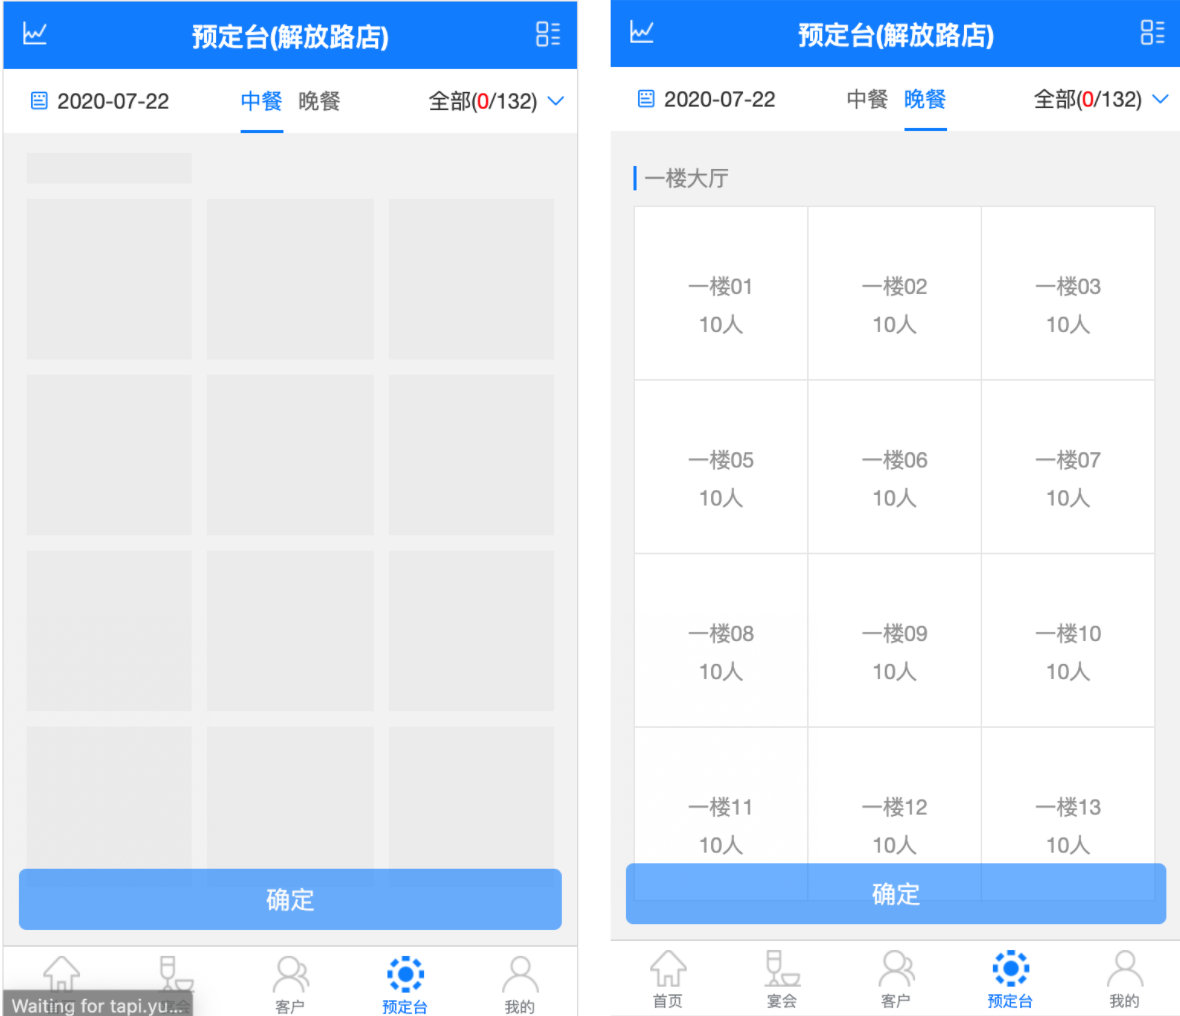
之前博客提到了如何在 Vue 中使用插件实现骨架屏效果,而且骨架屏 UI 素材使用的是图片。一旦我们没有设计师帮助提供图片或者插件失效就没辙了。所以这次记录下如何在不使用插件的前提下,使用 HTML+CSS 实现一个自定义骨架屏。
最终效果 代码文件 封装组件
yyt-st-skeleton.vue
1 2 3 4 5 6 7 8 9 10 11 12 13 14 15 16 17 18 19 20 21 22 23 24 25 26 27 28 29 30 31 32 33 34 35 36 37 38 39 40 41 42 43 44 45 46 47 48 49 50 51 52 <template > <view > <view class ="yyt-st-skeleton" :style ="{ top: top + 'rpx' }" v-if ="show" > <view class ="yyt-st-area-name" > </view > <view class ="yyt-st-table-list-wrapper" > <div > </div > <div > </div > <div > </div > <div > </div > <div > </div > <div > </div > <div > </div > <div > </div > <div > </div > <div > </div > <div > </div > <div > </div > </view > </view > <view v-else > <slot > </slot > </view > </view > </template > <script > export default { name: 'yyt-st-skeleton' , props: { top: { type: Number , default : 100 , require : false }, show: { type: Boolean , default : true , require : true } }, components: {}, data ( return {}; }, methods: {} }; </script > <style lang ="less" scoped > @import url('yyt-st-skeleton.less' ); </style >
yyt-st-skeleton.less
1
2
3
4
5
6
7
8
9
10
11
12
13
14
15
16
17
18
19
20
21
22
23
24
25
26
27
28
29
30
31
32
33
34
35
36
37
38
39
40
41
42
43
44
45
46
47
48
49
50
51
52
53
54
55
56
57
58
59
60
61
62
63
64
65
66
67
68
69
70
.bgImg { background-image : linear-gradient ( 90deg , rgba(#fff, 0 ), rgba (#fff, 0.5 ), rgba (#fff, 0 ) ); background-size: 40px 100%; // width of the shine background-repeat : no-repeat ; // No need to repeat the shine effect background-position : left -40px top 0; // Place shine on the left side , with offset on the left based on the width of the shine - see background-size animation: shine 1s ease infinite; // increase animation time to see effect in 'slow-mo' } @bg: #e6e6e6; .yyt-st-skeleton { position : relative; box-sizing : border-box; width : 100vw ; padding : 10 rpx 20 rpx; display : flex; flex-direction : column; align-items : flex-start; .yyt-st-area-name { width : calc (100% / 3 - 20rpx ); height : 40rpx ; background-color : @bg ; margin-bottom : 10rpx ; margin-left : 10rpx ; .bgImg (); } .yyt-st-table-list-wrapper { width : 100% ; height : 100vh ; box-sizing : border-box; margin : 10 rpx; text-align : center; margin : 0 auto; display : grid; grid-template-rows : repeat (auto-fill, calc(100vw / 3 - 2 * 10 rpx)); grid-template-columns : repeat (auto-fill, calc(100% / 3 )); & > div { background-color : @bg ; background-clip : content-box ; margin : 10rpx ; .bgImg (); } } } @keyframes shine { // to { // // Move shine from left to right, with offset on the right based on the width of the shine - see background-size // background-position : right -40px top 0; // } 0% { opacity : 1 ; } 50% { opacity : 0.6 ; } 100% { opacity : 1 ; } }
使用组件 1 2 3 4 5 6 7 8 <yyt-st-skeleton :show ="!ready" :top ="100" > </yyt-st-skeleton > export default { data() { return { ready: false, // 页面加载成功为true,默认为false } }, methods: { requestData() { setTimeout(() => { this.ready = true; }, 2000); } } }
骨架屏原理其实很简单,它其实就是个占位组件,用简单的 HTML 和 CSS 就能实现,当页面请求时显示,请求完毕后隐藏,与此同时显示加载数据成功后的界面。
如果需要在等待期间骨架屏有动画效果,使用 CSS3 的 animation + @keyframes 就能完成。
